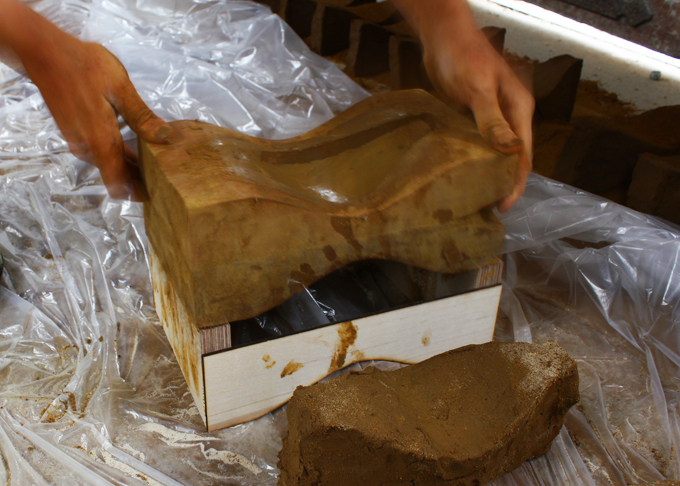
I've made a few hundred bricks now, which has allowed me to develop a fairly successful molding process, but has also allowed me to see the potential improvements to First Mold.
Sand, as a release agent, is essential, both on the mold and on the clay. I've found that the mold works best when it has been 'seasoned' with a few bricks- the first few of each molding session are more likely to stick.
I regret not making a bottom profile, because I have to fill the mold with a lot more clay than is necessary. I have to pack it well, making sure to push my fingers into the corners.
I scrape off the excess clay. A simple piece of plywood works well, and follows the profile of the mold nicely.
Because the clay sieve I use still allows small pieces of flint to remain in the mixture, the plywood can drag the flint across the surface. When this happens, which is most of the time, I smooth it over with water.
To release the clay, I have to whack the mold a few times. Since this picture was taken, I have learned that hitting it on the corners, and not flat, is more effective and lessens the distortion of the brick.
I then carry it to its place on the floor, where I have to bang it one more time to drop the brick out. That is one problem with this mold. The impact of the brick hitting the ground, as well as the impacts from release, distort the clay, so it is never exactly the shape of the mold when it is finished. I think a multi-part mold would make more precise bricks. The one in the picture above, however, is a particularly unsuccessful one; I've improved my technique since then. I know now to hit it lightly, as vertically as possible. I also have to restrain myself from touching any edges right after the brick comes out. I find myself thinking 'oh, I could just smooth over that tiny crack' but I know it's better to wait a day, and then do the touch-ups.
The plastic sheet in the previous picture was an experiment; some of the bricks were cracking during the first day of drying, and J. (a former professional ceramicist, and a regular at the farm) suggested that it might be due to the fact that the sand was preventing the brick from shrinking the way it wanted to. That was one conjecture, another was the proportion of sand to clay in the brick mixture. Actually, the cracks seemed to appear at random, so I believe they are probably from an error in the molding process.
You can see that the bottom row is much improved. Another thousand or so, and they should look even better...


Comments
Post a Comment